Installing a tile floor is a game-changer that can dramatically improve any space’s visual appeal, whether it’s a large kitchen or a small bathroom floor. Although laying tile can be a fulfilling DIY activity, it’s still a complex and time-consuming task. If you choose to install tile yourself, you will need patience, accuracy, and all the right tools.
Hiring a professional to install your ceramic tile flooring will likely result in faster, better-looking results that last longer. Whether you decide to handle it yourself or hire an expert, a good tile floor installation depends on your ability to understand how to lay tile from start to finish.
Equipment and Tools
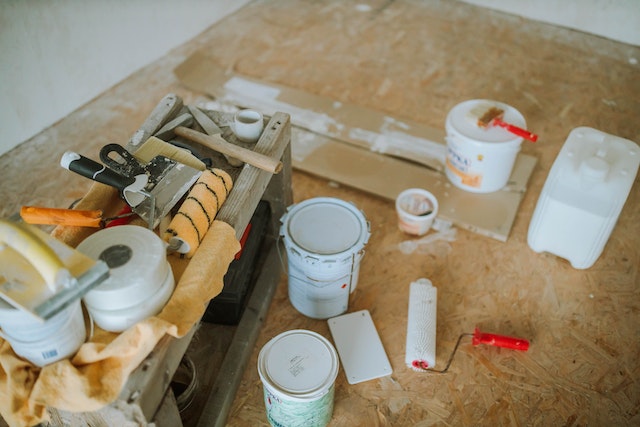
Starting a ceramic floor tile installation project requires the appropriate tools and equipment, a steady hand, and perseverance. Whether you’re a professional or a do-it-yourself enthusiast, having the right tools is essential to installing floor tile. This is a detailed inventory of all the tools and equipment you need:
- Chisel – For removing the old tiles.
- Floor scraper – Food removing old mortar.
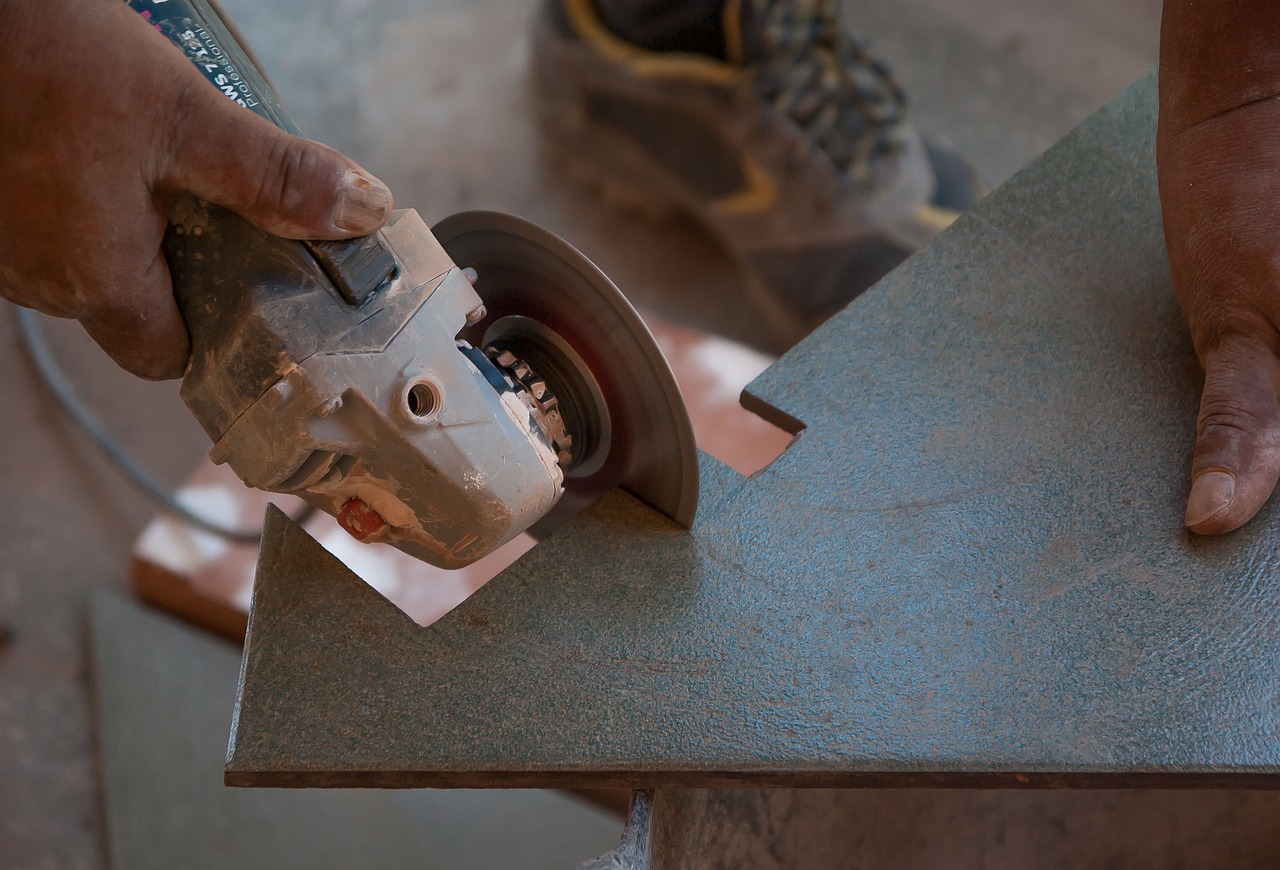
- Tile cutter – Use a manual snap tile cutter for straight, clean cuts. For precision, cut tiles with a wet saw.
- Tile nippers – Useful for cutting around curves or irregularities in surfaces, such as corners or pipes.
- Notched edge trowel – Necessary to distribute glue uniformly, a notched trowel is important for evenly laying tile.
- Flat margin trowel – For mixing and applying mortar or adhesive.
- Rubber float – The rubber tile float is essential for evenly laying grout between tiles.
- Rubber mallet – Helpful for carefully placing tiles without shattering them.
- Leveling spacers – A symmetrical finish depends on uniform spacing between tiles, which these little plastic bits provide.
- Big sponges and buckets – Required to remove extra grout and maintain a clean work environment.
- Tape measure and chalk line – Necessary for precise measurement and to guarantee a square and straight ceramic tile arrangement.
- Level – An essential tool for guaranteeing even and level tile placement.
- 2×4 scrap lumber – Useful for making a straight edge guide for laying floor tiles
- Framing square – Assists in precisely aligning tiles and preserving right angles.
- Safety goggles and rubber gloves – Essential for personal protection, particularly when you cut tile or prepare mortar.
Materials
Choosing the appropriate materials affects your tiled floor’s longevity and ease of installation. It’s critical to select materials that complement your design scheme and fulfill the functional needs of the tiled area. The following is a list of necessary supplies for installing floor tiles:
- Tiles – Select floor-rated tiles by considering durability, size, color, and texture. Make sure to have enough tiles, or at least 5% more than the square footage. Prepare the pattern in advance so you use as many whole tiles as possible and place cut tiles in less visible places.
- Thinset mortar – Choose the one that works best for your tiles and subfloor while applying tiles to it.
- Tile grout – Choose a color that matches your tiles and the width of your grout lines from a variety of options.
- Grout sealer – Assists in shielding grout from stains and moisture.
- Cement backer board – In locations with a lot of moisture, a cement backer board offers a sturdy and water-resistant tile base.
- Fiberglass seam tape – Used to strengthen the cement board seams.
- Backer board screws – Stainless steel backer board screws, usually measuring 1.25″ to 2.75″, are used to fasten the cement board to the subfloor.
- Grout haze remover – To remove any last traces of haze left over from grouting.
- Tile spacers – To keep grout lines between tiles consistent.
- Roll-on waterproofing agent – An optional extra waterproofing step to do prior to installing tile.
Preparation
Before you start with the installation process, you will need to prepare for it. Here is what you need to do:
- Protection – Make sure you wear protective equipment to avoid getting chunks of ceramic and dust into your eyes and mouth. Plug the sewer pipe with an old rag.
- Remove the existing tile – Use a chisel and a hammer, be careful not to get hurt.
- Remove the old mortar – Use the floor scraper to remove all of it so your new tile adheres properly.
- Prepare the subfloor – The subfloor needs to be fully free from any contamination or grease. You also need to be sure it doesn’t have any water damage. Lay down the mortar and the cement backer board, section by section. Overlap all seams in the subfloor by at least four inches. Screw it in starting from the center outwards.
Once the backer board is installed and dried, you can move on to the next step. Lay out the tiles dry, without mortar:
- Measuring – Measure each wall to find the midpoint. Connect the midpoint to its counterpart on each opposite wall with chalk to find the center point in the middle of the room. This is where you will lay the first tile.
- Testing – Place more tiles further in the room to test how they will look closer to the wall. Use tile spacers to account for the grout. This will give you a better idea if you need to move anything around to reduce the number of tiles you need to cut.
Prepare Mortar
One of the most important steps in installing a ceramic tile surface is properly preparing the mortar. The adhesive used to attach tiles is called mortar, and the process is sometimes known as laying thinset. It must be thoroughly mixed to guarantee a solid, long-lasting grip. Here’s how to get the mortar ready:
- Choose the right mortar – Choose a thinset mortar that suits the sort of tile you are using and the layout of the space. Certain mortars, for instance, are made especially for places with a lot of moisture, like toilets.
- Assemble your tools – A flat-margin trowel, a big mixing bucket, and a drill with a mixing paddle attachment are required. Make sure there are no leftover materials on your instruments that could contaminate the mixture.
- Don’t mix too much in advance – Only mix the amount that you’ll need for 30 minutes to one hour of work. It’s no longer workable and ought to be thrown out when it starts to solidify in the bucket.
- Mixing mortar – Pour the dry mortar mix into the bucket to begin mixing the mortar. For information on the proper mortar-to-water ratio, consult the manufacturer’s instructions. Add water a little at a time and blend. To get a consistent blend, use the drill at a low to medium speed while using a mixing paddle.
- The right consistency – Aim for a peanut butter consistency. The mortar needs to be solid enough to maintain its shape but still damp enough to stick to the tile. Add additional dry mortar if the mixture is too runny and a little more water if it is too thick.
- Let it slake – Give the mortar five to ten minutes to settle after mixing. This technique, called “slaking,” improves the adhesive qualities of the mortar by allowing the water to completely permeate the dry materials.
- One more stir – Give it one last stir to guarantee consistent consistency throughout. You can now use your mortar.
Lay Mortar
A crucial first step in installing tiles is laying mortar, which calls for attention to detail and precision. The procedure guarantees your tiles will stick to the substrate uniformly and firmly. Make sure the substrate is dry, clean, and level. The adherence of the mortar might be impacted by any dust, particles, or moisture. Here are the steps:
- First layer – Scoop and spread a thin layer of mortar onto a portion of the substrate using the flat side of your notched trowel. To avoid the mortar drying out before the tiles are set, work in small sections.
- Creating ridges – After applying the first thin layer, make ridges in the mortar with the trowel’s notched side. Use the trowel to produce even, straight lines while holding it at a 45-degree angle to the ground. Do not make swirling The notches improve tile adherence by controlling the quantity of mortar on the surface. Larger tiles require deeper ridges.
- Keep the area’s thickness constant – Uniformity is crucial in guaranteeing that every tile is level after installation. Avoid applying too much mortar at once by working in sections. The notches should equal the thickness of the tile.
- Inspect the tiles – Every now and then, lift a tile to inspect the back. The mortar needs to cover the entire surface. Dry patches indicate improper mortar adhesion, where you you may need to use more mortar or apply more pressure.
Make sure you’re laying the mortar in straight, even sections that correspond with your tile layout plan.
Lay the Tiles
Laying the tiles will require excellent focus and good planning. Here are the steps:
- Be quick but focused – The tiles should be laid as soon as the mortar is applied while it is still wet.
- Place tiles gently – To ensure a secure fit, gently place the tile onto the mortar and twist it slightly. The mortar ridges may move if you slide the tile, so proceed with caution.
- Place spacers – Position tile spacers at the corners where tiles overlap as you arrange each tile. They give tiles some leeway to slightly expand and contract due to variations in humidity and temperature.
- Make sure the tiles are level – Using a spirit level or a straight edge, check the tiles’ level on a regular basis. To ensure that the tiles are equally positioned in the mortar, give them a gentle knock with a rubber mallet. This step is crucial to preventing “lippage,” or uneven tiles.
Cut the Tiles and Lay Edges
In any tile installation operation, tiles will need to be customized to fit around obstacles and corners. Cutting tile precisely is essential for smooth, polished tile floors.
Using the correct tool is essential for successful tile cutting:
- A tile cutter, or manual snap cutter, is perfect for straight cuts. It neatly scores and snaps the tile
- A wet tile saw is better for intricate cuts, like those made around pipelines or odd forms.
- For accurate cuts, a water-cooled diamond blade is best.
- Tile nippers are useful for making tiny, curved cuts.
Take measurements of the area where the tile will fit before making any cuts. Here’s how to properly measure and cut the tiles:
- Mark – Use a pencil or tile marker to transfer these measurements to the tile. Make sure it’s accurate because it affects how the tile fits in the area.
- Cut straight – Line up the tile with the cutting wheel of a snap cutter to achieve a straight cut. After running the cutter across the tile’s surface to score it, snap the tile along the scored line by applying pressure.
- Wear PPE – Be careful to wear gloves and safety glasses to protect your hands and eyes.
- Smooth out imperfections – Use tile nippers for finishing touches for trimming minor curves or notches. To get the right shape, carefully chew away the extra tile. To prevent shattering the tile, take your time and make tiny cuts. Use sandpaper or a tile stone to smooth any sharp or uneven edges after cutting.
After cutting the edge tiles, arrange them in the same way as the complete tiles. When you lay tile make sure the chopped edges face inward so they fit tightly against walls or around obstructions, where they won’t be as obvious.
Remove the Spacers
One easy but crucial step in the installation of ceramic tiles is removing the spacers. Spacers are essential for maintaining consistent grout line spacing throughout the laying stage, but their function ends as the mortar hardens. Here’s how to remove spacers:
- Give the mortar time to fully dry – Usually, this takes a full day, but for precise drying periods, it’s best to consult the mortar manufacturer’s recommendations. If spacers are removed too soon, tiles may shift, and your tile job may become less uniform.
- Take care of the edges – Spacers can occasionally become loose and lodged in the mortar. In the event of that, carefully wiggle them free while being cautious not to harm the tile edges.
- Mind the gaps – Examine the gaps between the tiles and take out any extra mortar that might have leaked through after removing the spacers. To guarantee that the grout adheres correctly, these gaps must be free and uncluttered.
Your tile surface is now prepared for the next important step, grouting, once the spacers have been removed and the gaps have been cleaned.
Prepare for Grouting
Start by selecting the grout type that is appropriate for your tiles. Unsanded grout works well for finer lines, while sanded grout is usually utilized for broader joints. First, fill a clean bucket with water, and then gradually add grout powder in accordance with the manufacturer’s suggested ratio. Using a drill and paddle attachment, blend until the mixture is lump-free and uniform in texture, with peanut butter consistency. Before using, stir the mixture for one last minute, then let it slake for roughly ten minutes.
Apply Grouting
Here’s how to apply grouting:
- Fill – Fully fill the tile joints. Use a grout float to scoop and pour grout diagonally across the joints. To guarantee deep penetration into the joints, apply forceful pressure.
- Remove excess grout – Hold the float at a 45-degree angle and move it diagonally across the tiles after filling the joints.
- Clean – After letting the grout set a bit (see the manufacturer’s directions for details), gently clean the grout haze with a moist sponge. Make sure not to disturb the grout joints by frequently rinsing the sponge.
Seal the Grout Lines
Give the grout time to cure completely, usually 48 to 72 hours, before sealing. Using a tiny brush or grout sealer applicator, apply a grout sealer to the dried grout lines. This is an essential step in keeping the grout looking good and prolonging its life by shielding it from stains and moisture.
Clean Up the Tile Surface
Give the tile surface one more cleaning after the sealer has dried. Use a grout haze remover according to the directions on the product if there is still a grout haze. To keep the tiled surface shiny and avoid grout darkening, clean it on a regular basis using the proper cleansers.
Caulking
Caulking, the last stage of tile installation, is essential to guaranteeing the project’s longevity and attractive finish. It entails properly caulking the seams and edges, especially in wet locations like corners where walls meet, around fixtures like sinks and bathtubs, and where various materials transition:
- Choose the appropriate kind – This is usually a silicone-based sealant for wet areas. Make sure the surface is dry and clean before applying it.
- Apply – Using a caulking gun, apply the caulk smoothly along the seam after cutting the caulk tube’s tip at a 45-degree angle.
- Smooth – Smooth the caulk line as soon as possible with a wet finger or a caulk finish.
- Clean –Wipe away any excess caulk right away with a clean water damp towel.
Remember to follow the manufacturer’s directions and let the caulk cure completely before exposing the area to moisture. Caulked regions should also undergo routine maintenance and inspections to maintain the integrity of the seal.
If you need professional help for perfect tile floor installation, don’t hesitate to get in touch with experts who can help you through every stage of the procedure. PacWest Restoration has years of experience with flooring remodeling, all the right tools, and friendly professionals.


